Tipp
Falls du DigitalOcean nicht nutzt, kannst du dennoch die Bereitstellung in einer anderen Umgebung automatisieren.
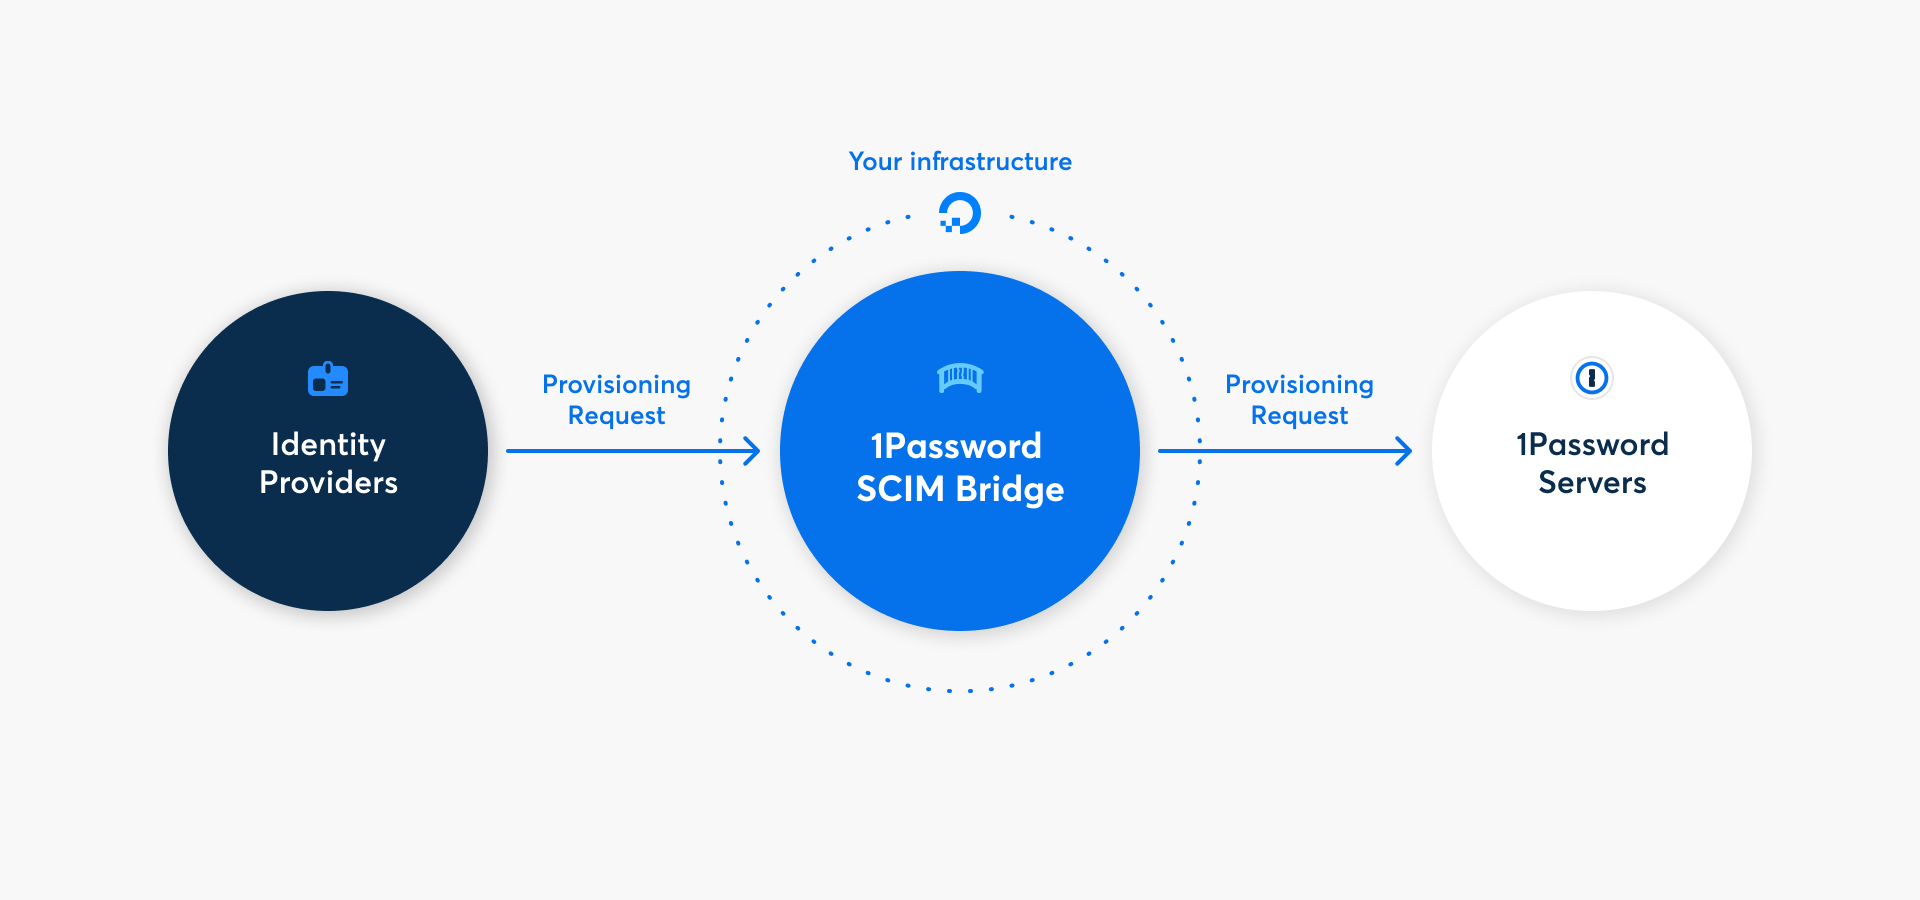
Mit 1Password Business kannst du viele gängige Verwaltungsaufgaben mit der 1Password SCIM-Bridge automatisieren. Es nutzt das SCIM-Protokoll (System for Cross-Domain Identity Management), um 1Password mit deinem bestehenden Identitätsanbieter wie Google Workspace, JumpCloud, Microsoft Entra ID, Okta, OneLogin oder Rippling zu verbinden.
Du kannst 1Password SCIM-Bridge auf DigitalOcean mit der Marketplace-App bereitstellen, indem du die folgenden Schritte befolgst. Alternativ kannst du auch auf der DigitalOcean App Platform bereitstellen, die eine kostengünstigere und anpassbare Bereitstellungsoption darstellt.
Schritt 1: 1Password SCIM Bridge auf DigitalOcean bereitstellen
Falls du noch kein DigitalOcean-Konto hast, erstelle eines. Dann folge diesen Schritten.
1.1: Erstelle einen Cluster
Die SCIM-Bridge muss innerhalb eines Clusters bereitgestellt werden. Um einen Cluster zu erstellen:
- Besuche 1Password SCIM-Bridge im DigitalOcean Marketplace und wähle App installieren.
- Wähle New Cluster (Neuen Cluster) > Install (Installieren).
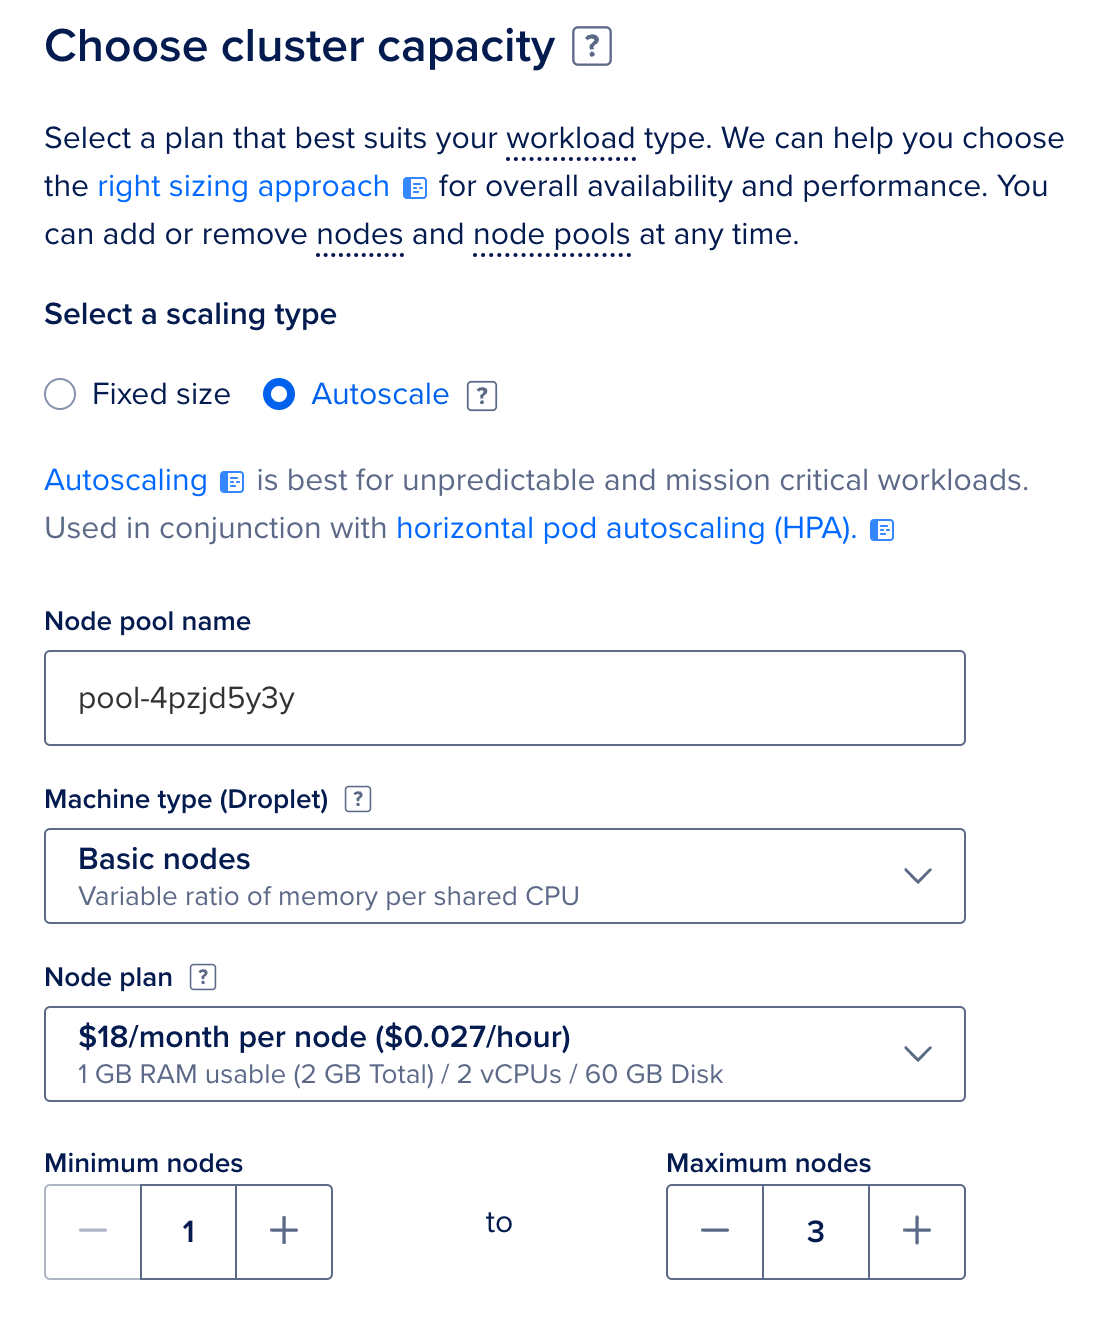
- Scrolle nach unten zu „Choose cluster capacity“ (Cluster-Kapazität wählen).
- Wähle Set node pool to autoscale (Node-Pool auf automatische Skalierung setzen) aus.
- Wähle im Menü „Node plan“ 2 GB total RAM / 2 vCPUs / 60 GB storage..
- Ändere „Minimum nodes“ (Minimale Knoten) auf 1, dann ändere „Maximum nodes“ (Maximale Knoten) auf 3.
- Scrolle nach unten und wähle Create Cluster (Cluster erstellen).
Dein Cluster wird jetzt erstellt. Nach ein paar Minuten erhältst du eine E-Mail von DigitalOcean, um zu bestätigen, dass dein Load Balancer bereit ist.
1.2: 1Password SCIM Bridge einrichten
Nachdem dein Load Balancer bereit ist:
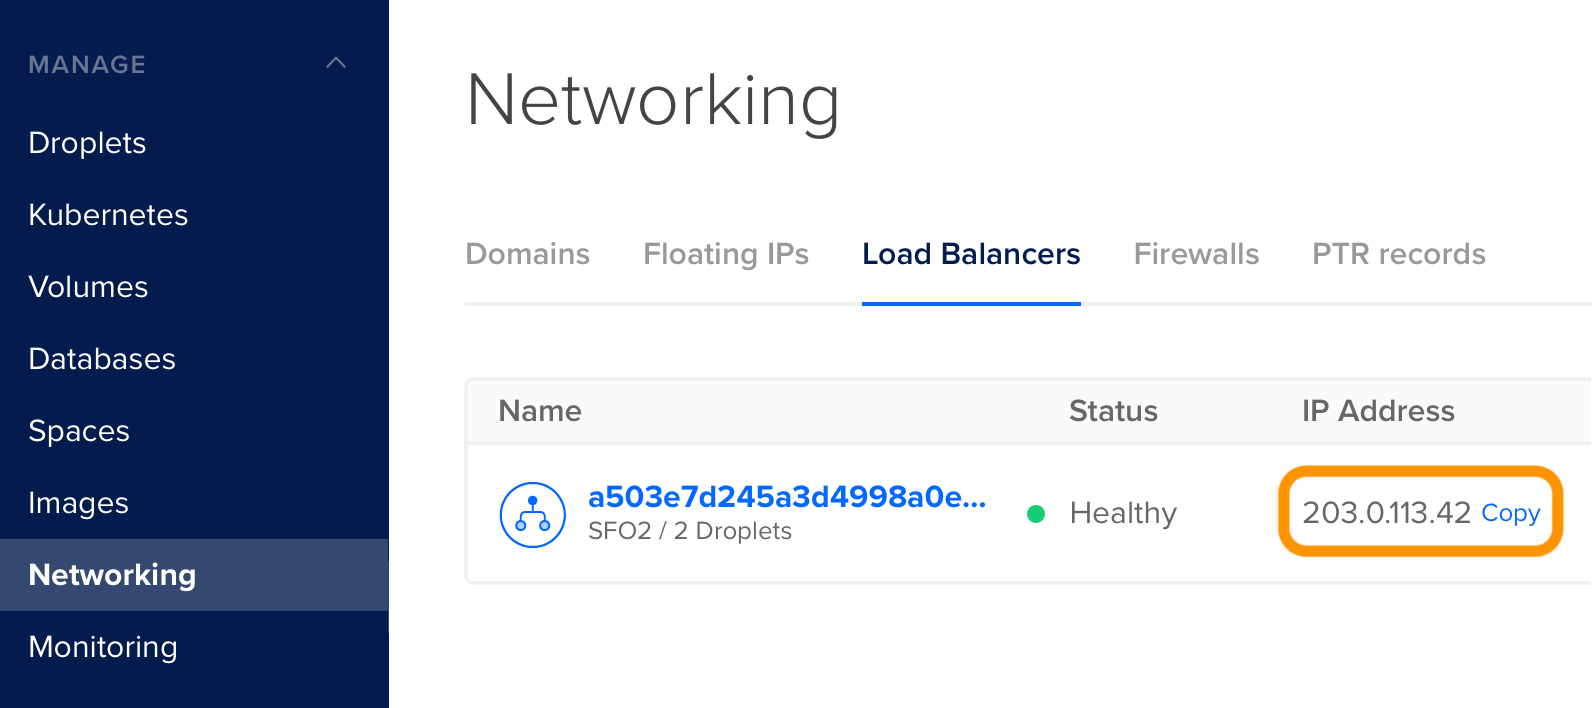
- Klicke in der Seitenleiste auf Networking und wähle Load Balancers aus. Du wirst die IP-Adresse für deinen Load Balancer sehen.
- Konfiguriere einen DNS-A-Eintrag für deine gewählte Domain und leite ihn auf die IP-Adresse deines Load Balancers um. Zum Beispiel:
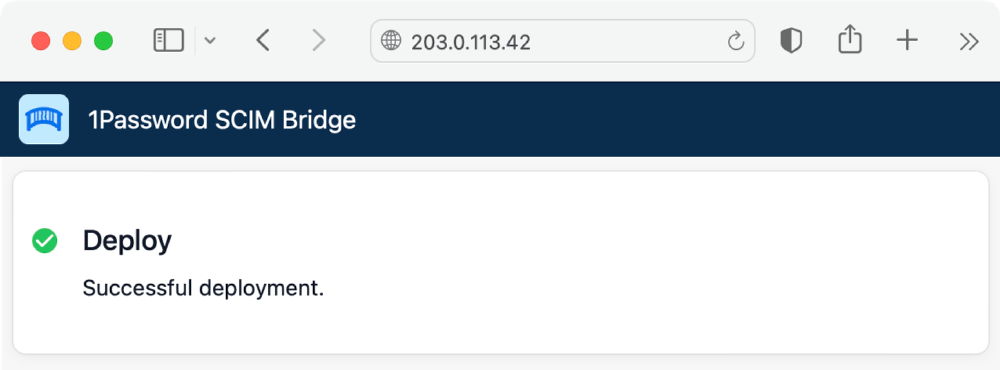
scim.example.com. - Warte, bis der DNS propagiert ist, und navigiere dann zu deiner SCIM-Bridge-Domain.
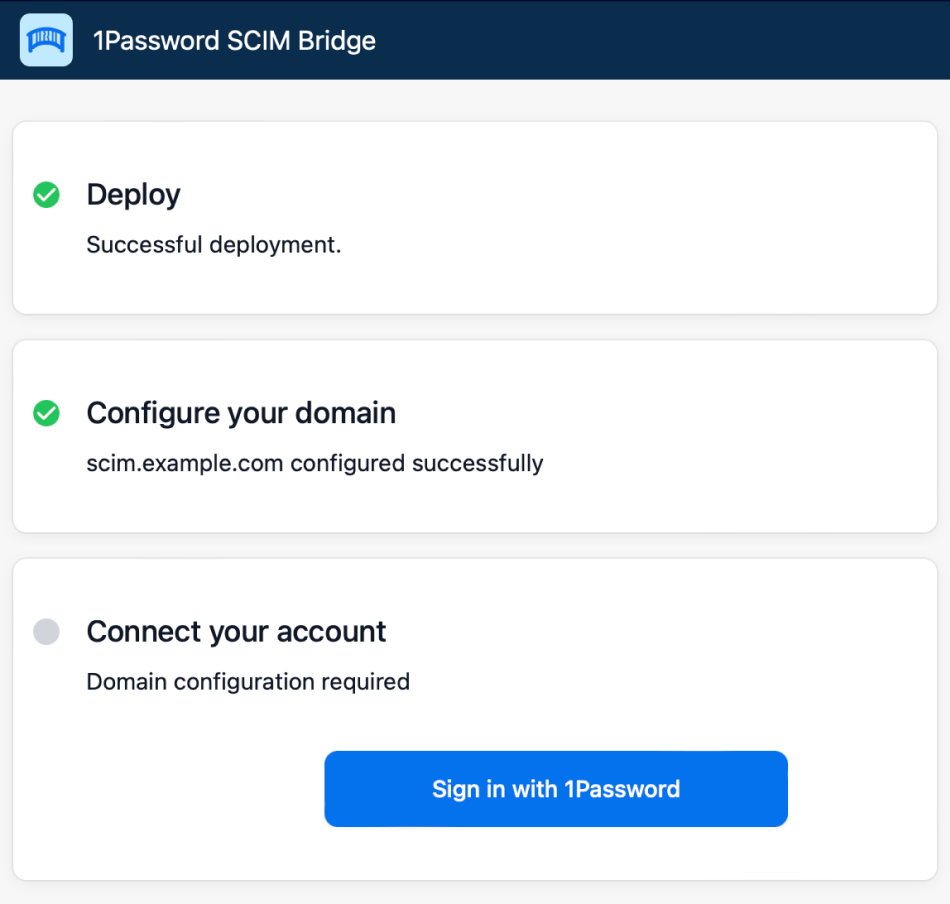
Du wirst die 1Password SCIM-Bridge Setup-Seite sehen.
Schritt 2: Verbinde die 1Password SCIM Bridge mit deinem 1Password-Konto
2.1: Melde dich bei deinem 1Password-Konto an
Auf der 1Password SCIM Bridge-Setup-Seite:
- Gib den Domainnamen ein, den du für deinen Load Balancer konfiguriert hast, um ihn zu verifizieren.
- Klicke auf Anmelden und folge den Anweisungen auf dem Bildschirm.
Erfahre, was du tun kannst, wenn du die Details einer bestehenden Bereitstellungsintegration siehst.
2.2: Authentifizierung mit 1Password SCIM-Bridge
Nachdem du den Einrichtungsprozess abgeschlossen hast, erhältst du eine scimsession-Datei und ein Bearer-Token. Speichere sie beide in 1Password, falls du sie erneut benötigst.
- Klicke auf <yourdomain> installieren. Du wirst die Statusseite der 1Password SCIM-Bridge sehen.
- Gib dein OAuth-Bearer-Token ein und wähle Verifizieren.
Wichtig
Das Bearer-Token und die scimsession-Datei, die du bei der Einrichtung erhältst, können zusammen verwendet werden, um auf Informationen aus deinem 1Password-Konto zuzugreifen. Du musst das Bearer-Token mit deinem Identitätsanbieter teilen. Allerdings solltest du es niemals an andere Personen weitergeben. Außerdem solltest du deine scimsession-Datei niemals an andere weitergeben.
Schritt 3: Verbinde deinen Identitätsanbieter mit der SCIM-Bridge
Wichtig
Wenn du bereits 1Password Business verwendest, solltest du sicherstellen, dass die E-Mail-Adressen und Gruppennamen in deinem 1Password-Konto mit denen deines Identitätsanbieters übereinstimmen.
- Wenn jemand eine andere E-Mail-Adresse in 1Password verwendet, bitte ihn oder sie, diese zu ändern.
- Falls du bereits bestehende Gruppen in 1Password hast, die du mit Gruppen in deinem Identitätsanbieter synchronisieren möchtest, passe die Gruppennamen in 1Password an.
Da die 1Password SCIM-Bridge einen SCIM 2.0-kompatiblen Webservice bietet, der OAuth-Bearer-Token zur Autorisierung akzeptiert, kannst du sie mit einer Vielzahl von Identitätsanbietern nutzen.
Verbinde dich mit dem Load Balancer, auf dem du die SCIM-Bridge konfiguriert hast (zum Beispiel: https://scim.example.com) und authentifiziere dich mit deinem OAuth-Bearer-Token.
Erfahre, wie du deinen Identitätsanbieter verbinden kannst:


Unterstützung erhalten
Hol dir Hilfe bei der SCIM-Bridge, zum Beispiel wenn du dein Bearer-Token oder deine Sitzungsdatei verloren hast.
Wenn du eine bestehende Bereitstellungsintegration hast
Wenn du auf der Einrichtungsseite die Details für eine bestehende Bereitstellungsintegration siehst, wähle die Option Anmeldedaten neu generieren und folge dann den Schritten, um die neuen Anmeldedaten in deinem 1Password-Konto zu speichern und sie auf deiner SCIM-Bridge zu installieren. Bestehende Einstellungen für die Integration, wie z. B. die von dir ausgewählten verwalteten Gruppen, werden beibehalten.
Wenn du vorhandene Einstellungen nicht beibehalten musst, wähle Weitere Aktionen > Bereitstellung deaktivieren. Wähle dann auf der Einrichtungsseite erneut Anmelden aus.
Um weitere Hilfe zu erhalten oder Feedback zu geben, kontaktiere den 1Password Business Support oder nimm an der Diskussion mit der 1Password Support Community teil.
Mehr erfahren
War dieser Artikel hilfreich?
Freut mich, das zu hören! Wenn du etwas hinzufügen möchtest, zögere nicht, uns zu kontaktieren.
Tut mir leid, das zu hören. Bitte kontaktiere uns, wenn du uns mehr darüber erzählen möchtest.