
Bereitstellung
- Benutzer erstellen. Benutzer, die in Rippling erstellt wurden, werden auch in 1Password erstellt.
- Benutzerattribute aktualisieren. Wenn du den Namen eines Benutzers in Rippling änderst, wird auch sein Name in 1Password geändert.
- Benutzer deaktivieren. Wenn du einen Benutzer deaktivierst oder seinen Zugang zu 1Password in Rippling sperrst, wird der Benutzer in 1Password deaktiviert.
Gruppen verwalten
- Gruppenmitgliedschaften synchronisieren. 1Password-Gruppen sind in Rippling verfügbar. Alle Änderungen, die du an den Gruppenmitgliedschaften vornimmst, werden automatisch mit 1Password synchronisiert.
- Teams und Abteilungen verwenden. Du kannst deine Rippling-Teams und -Abteilungen verwenden, um Benutzer zu 1Password-Gruppen hinzuzufügen und zu entfernen.
Schritt 1: Füge deinem 1Password-Konto Provisioning hinzu
Bevor du mit der Bereitstellung beginnen kannst, musst du die Rippling-Bereitstellungsintegration hinzufügen. Melde dich in deinem 1Password-Konto an, klicke in der Seitenleiste auf Integrationen und dann auf Rippling.
Wenn du die Details einer bestehenden Bereitstellungsintegration siehst, musst du sie zuerst deaktivieren. Klicke auf Weitere Aktionen und wähle Bereitstellung deaktivieren. Klicke dann erneut auf der Einrichtungsseite für die SCIM-Bridge auf Anmelden.
Nachdem du den Einrichtungsprozess abgeschlossen hast, erhältst du eine scimsession-Datei und ein Bearer-Token. Speichere beide in 1Password. Du wirst sie in Schritt 3 benötigen, wenn du das automatische Hosting von Rippling einrichtest.
Wichtig
Das Bearer-Token und die scimsession-Datei, die du bei der Einrichtung erhältst, können zusammen verwendet werden, um auf Informationen aus deinem 1Password-Konto zuzugreifen. Du musst diese Daten mit Rippling teilen. Allerdings ist es wichtig, dass du sie niemals anderweitig weitergibst.
Schritt 2: Füge die 1Password-App zu Rippling hinzu
Um die 1Password-Anwendung hinzuzufügen, melde dich bei deinem Konto auf Rippling.com und folge den beschriebenen Schritten:
- Klicke auf Add New App (Neue App hinzufügen).
- Suche nach 1Password und klicke darauf.
- Auf der 1Password-Anwendungsseite klicke auf Connect Account (Konto verbinden).
- Wenn du Besitzer oder Administrator deines Geschäftskontos bist, klicke auf I’m the 1Password admin, I’ll install it (Ich bin der 1Password-Admin, ich werde es installieren).
Folge dann den Anweisungen auf dem Bildschirm, um dein 1Password-Konto mit Rippling zu verbinden.
Schritt 3: 1Password SCIM Bridge bereitstellen
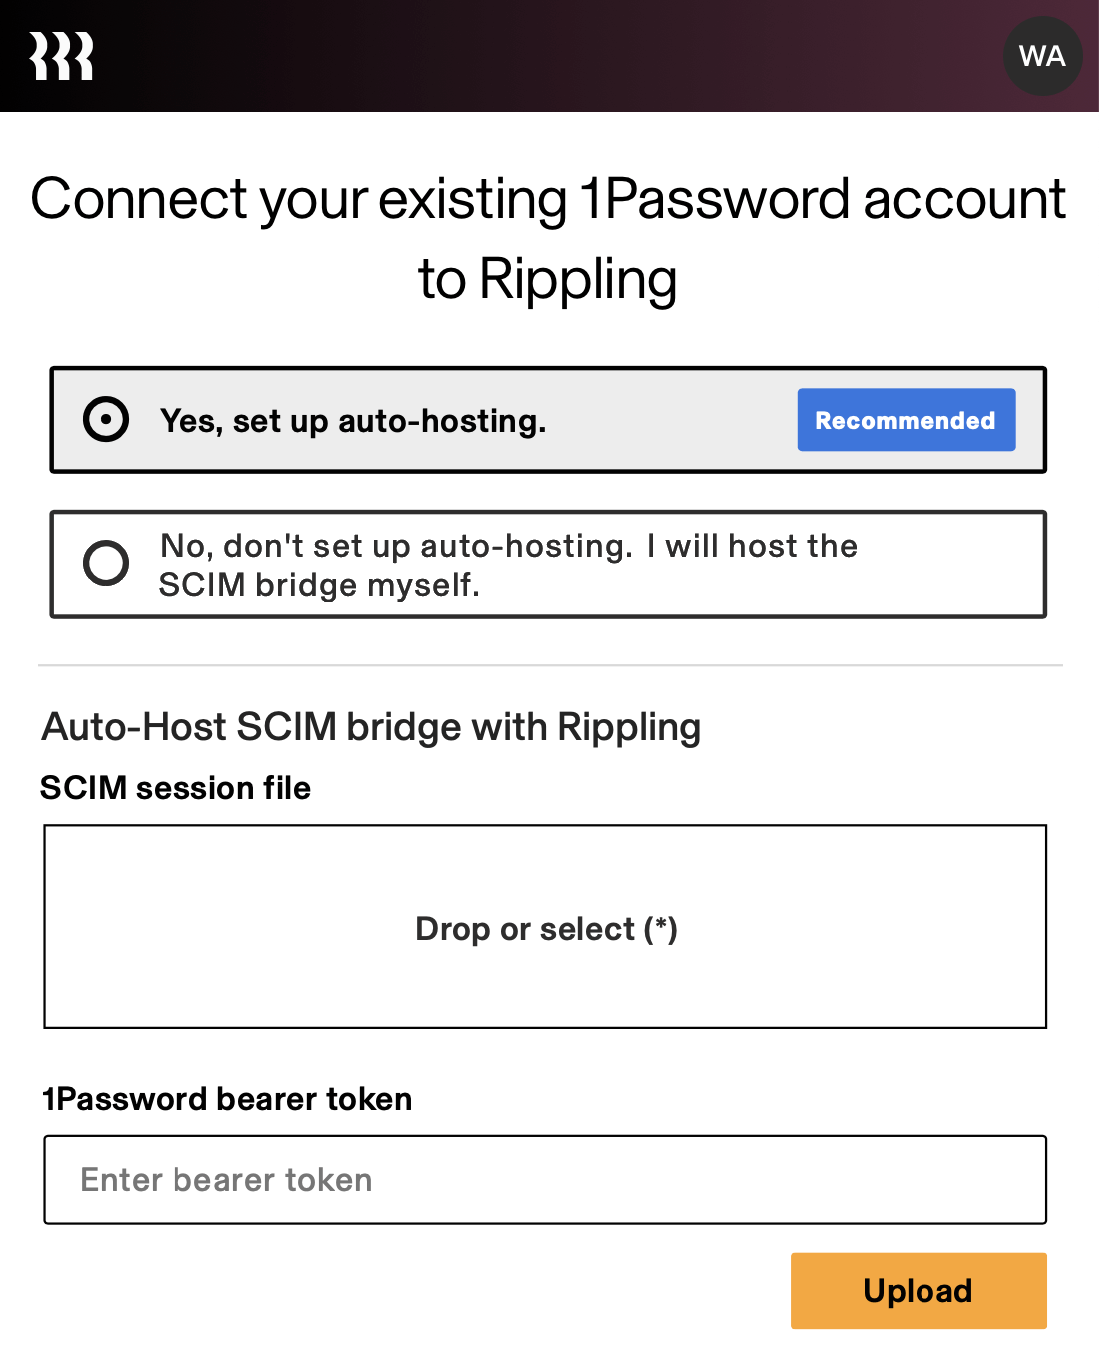
Um die SCIM-Bridge mit Rippling-Autohosting bereitzustellen:
- Wenn du dazu aufgefordert wirst, wähle Yes, set up auto-hosting (Ja, Auto-Hosting einrichten).
- Ziehe deine
scimsession-Datei zu Rippling, gib dann dein Bearer-Token ein und klicke auf Upload (Hochladen).
Wenn das Setup abgeschlossen ist, klicke auf Move to Next Step (Zum nächsten Schritt wechseln) und befolge die Anweisungen auf dem Bildschirm, um die Einrichtung von Rippling abzuschließen.
Wenn du die SCIM-Bridge auf deiner eigenen Infrastruktur bereitstellen möchtest, starte das Bereitstellungs-Setup erneut und wähle eine benutzerdefinierte Bereitstellungsoption. Dann verbinde Rippling.
Einstellungen
Um die Mitarbeiter eines Teams oder einer Abteilung zu einer 1Password-Gruppe hinzuzufügen:
- Klicke in der 1Password-Anwendung auf die Registerkarte Gruppen.
- Klicke neben der Gruppe auf Bearbeiten.
- Gib den Team- oder Abteilungsnamen ein, klicke darauf und dann auf Bestätigen.
Weitere Informationen findest du im Rippling-Hilfecenter.
Next steps
Wenn du bestehende Gruppen in 1Password hast, die du mit Rippling synchronisieren möchtest, füge sie den Gruppen hinzu, die durch Bereitstellung verwaltet werden. Klicke im Einrichtungsassistenten auf Details anzeigen oder klicke in der Seitenleiste auf Integrationen und wähle Verwalten. Klicke im Abschnitt Verwaltete Gruppen auf Verwalten und wähle dann die Gruppen aus, die synchronisiert werden sollen.
Wenn du zuvor SCIM-Bridge verwendet hast, musst du alle Gruppen auswählen, die bereits mit Rippling synchronisiert wurden. So vermeidest du Probleme bei der Synchronisierung mit deinem Identitätsanbieter, einschließlich doppelter Gruppen.
War dieser Artikel hilfreich?
Freut mich, das zu hören! Wenn du etwas hinzufügen möchtest, zögere nicht, uns zu kontaktieren.
Tut mir leid, das zu hören. Bitte kontaktiere uns, wenn du uns mehr darüber erzählen möchtest.