
Mit 1Password Business kannst du 1Password mit Okta integrieren, um viele gängige administrative Aufgaben zu automatisieren:
Bereitstellung
- Benutzer erstellen: Zugewiesene Benutzer und Gruppen werden in 1Password bereitgestellt.
Verwende Push Groups, um Gruppen aus deinem Verzeichnis mit 1Password zu synchronisieren.
- Benutzerattribute aktualisieren: Wenn du Benutzerattribute in deinem Verzeichnis änderst, werden die zugeordneten Attribute in 1Password ebenfalls geändert.
- Benutzer deaktivieren: Wenn du einen Benutzer deaktivierst oder den Zugriff des Benutzers auf 1Password in Okta sperrst, wird der Benutzer in 1Password gesperrt.
Import
- Benutzer und Gruppen importieren: Bestehende 1Password-Benutzer und -Gruppen werden importiert und können mit bestehenden Okta-Objekten verknüpft werden.
Gruppen verwalten
- Push-Gruppen: Verwende Push-Gruppen, um Gruppen aus deinem Verzeichnis mit 1Password zu synchronisieren oder bestehende 1Password-Gruppen in Okta zu verwalten.
Um Benutzer für 1Password bereitzustellen, verwende Okta-Gruppenzuweisungen.
To get started, sign in to your account on Okta.com , select Admin in the top right, and follow these steps.
Before you begin
Bevor du 1Password mit Okta integrieren kannst, benötigst du Folgendes:
- Einrichtung und Bereitstellung von 1Password SCIM Bridge.
- Die Funktion zur Verwaltung des Lebenszyklus in deinem Okta-Konto.
- Sicherstellung, dass die Bereitstellung von Benutzern und Gruppen auf der Seite „Automatisierte Benutzerbereitstellung“ deines 1Password-Kontos aktiviert ist.
Step 1: Add the 1Password application to Okta
These steps were recorded in June 2025 and may have changed since. Refer to the Okta documentation for the most up-to-date steps.
To add the 1Password Enterprise Password Manager application to Okta:
- Select Applications, then select Browse App Catalog.
- Search for 1Password Enterprise Password Manager and select it, then select Add Integration.
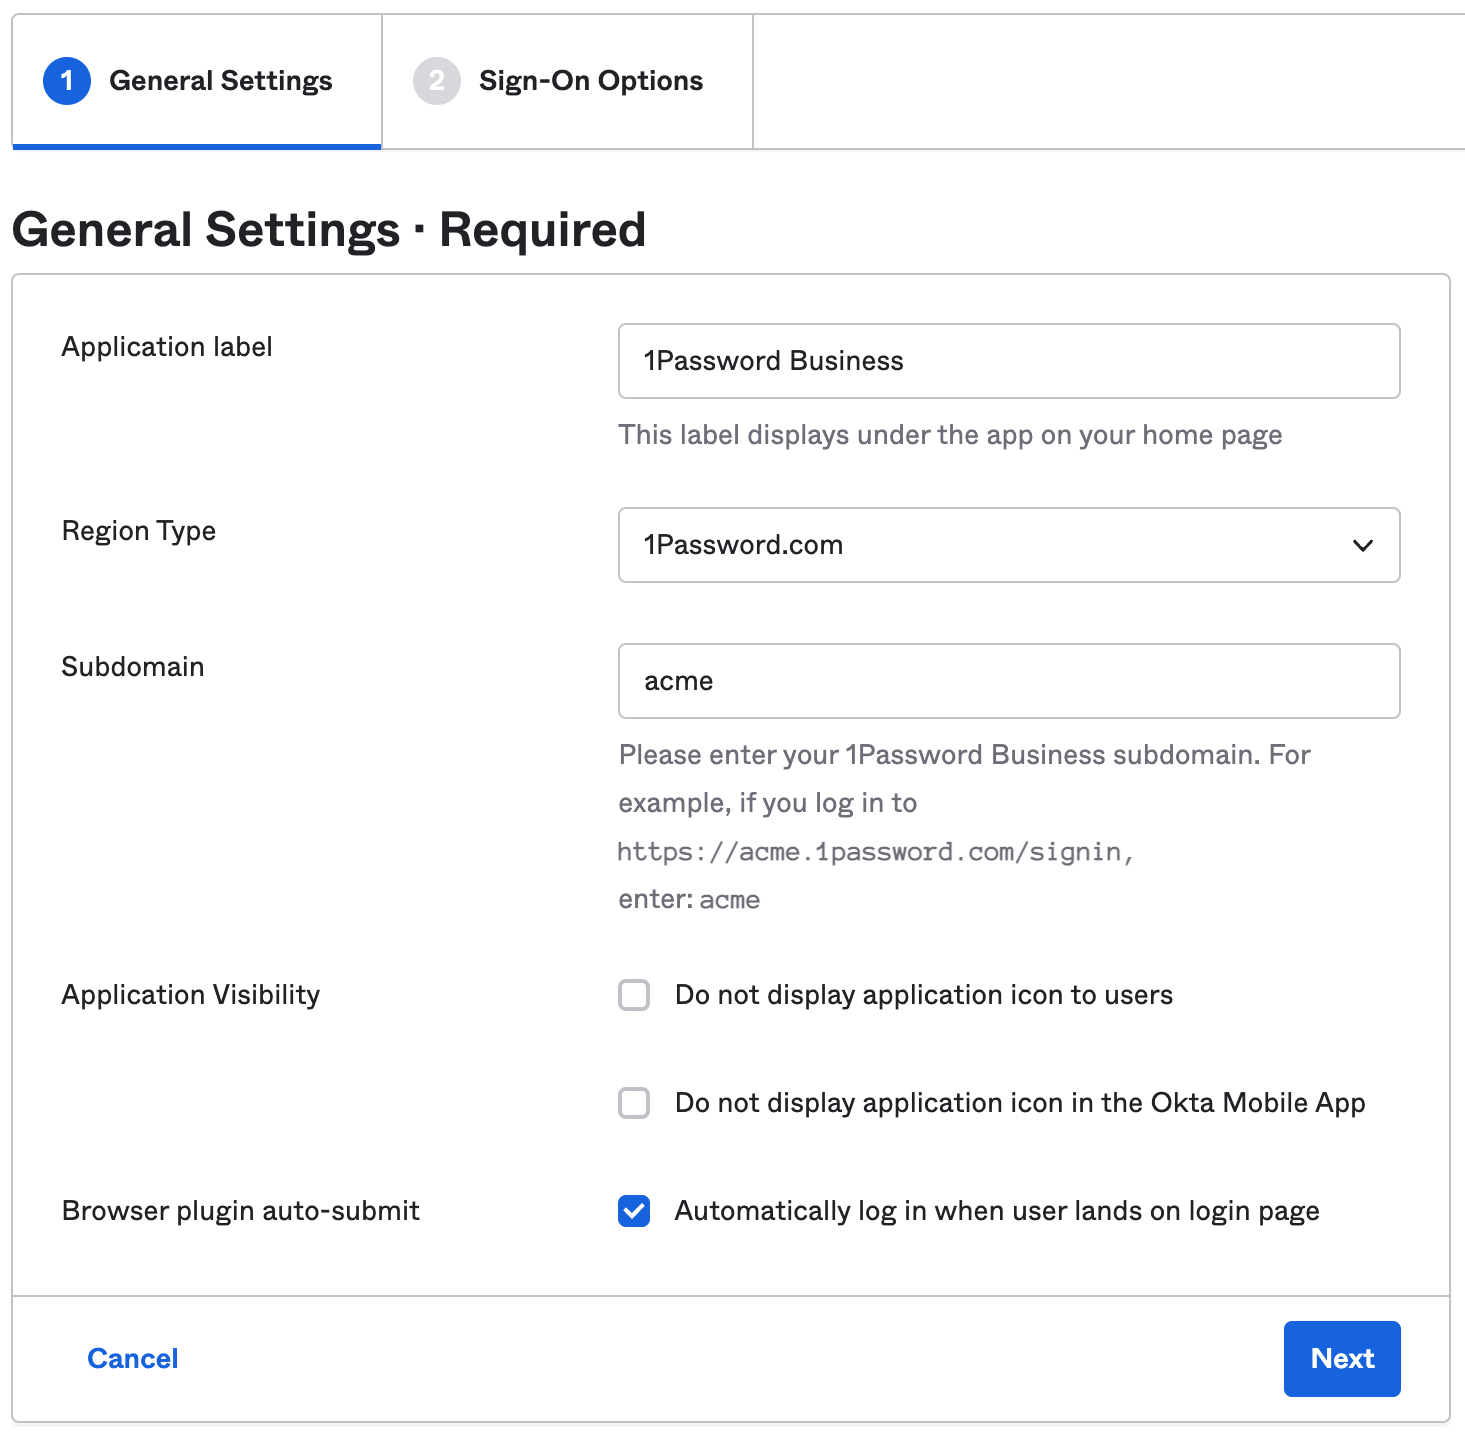
- Choose the region for your 1Password account, then enter the beginning of your sign-in address (for example:
acme) and select Next. - From the sign on methods, select Bookmark-only > Done.
Du wirst die Details der Anwendung sehen, die du gerade erstellt hast.
Schritt 2: Konfiguriere die Anwendung
On the 1Password Enterprise Password Manager application details page, select Provisioning. Then follow these steps.
2.1: API-Integration einrichten
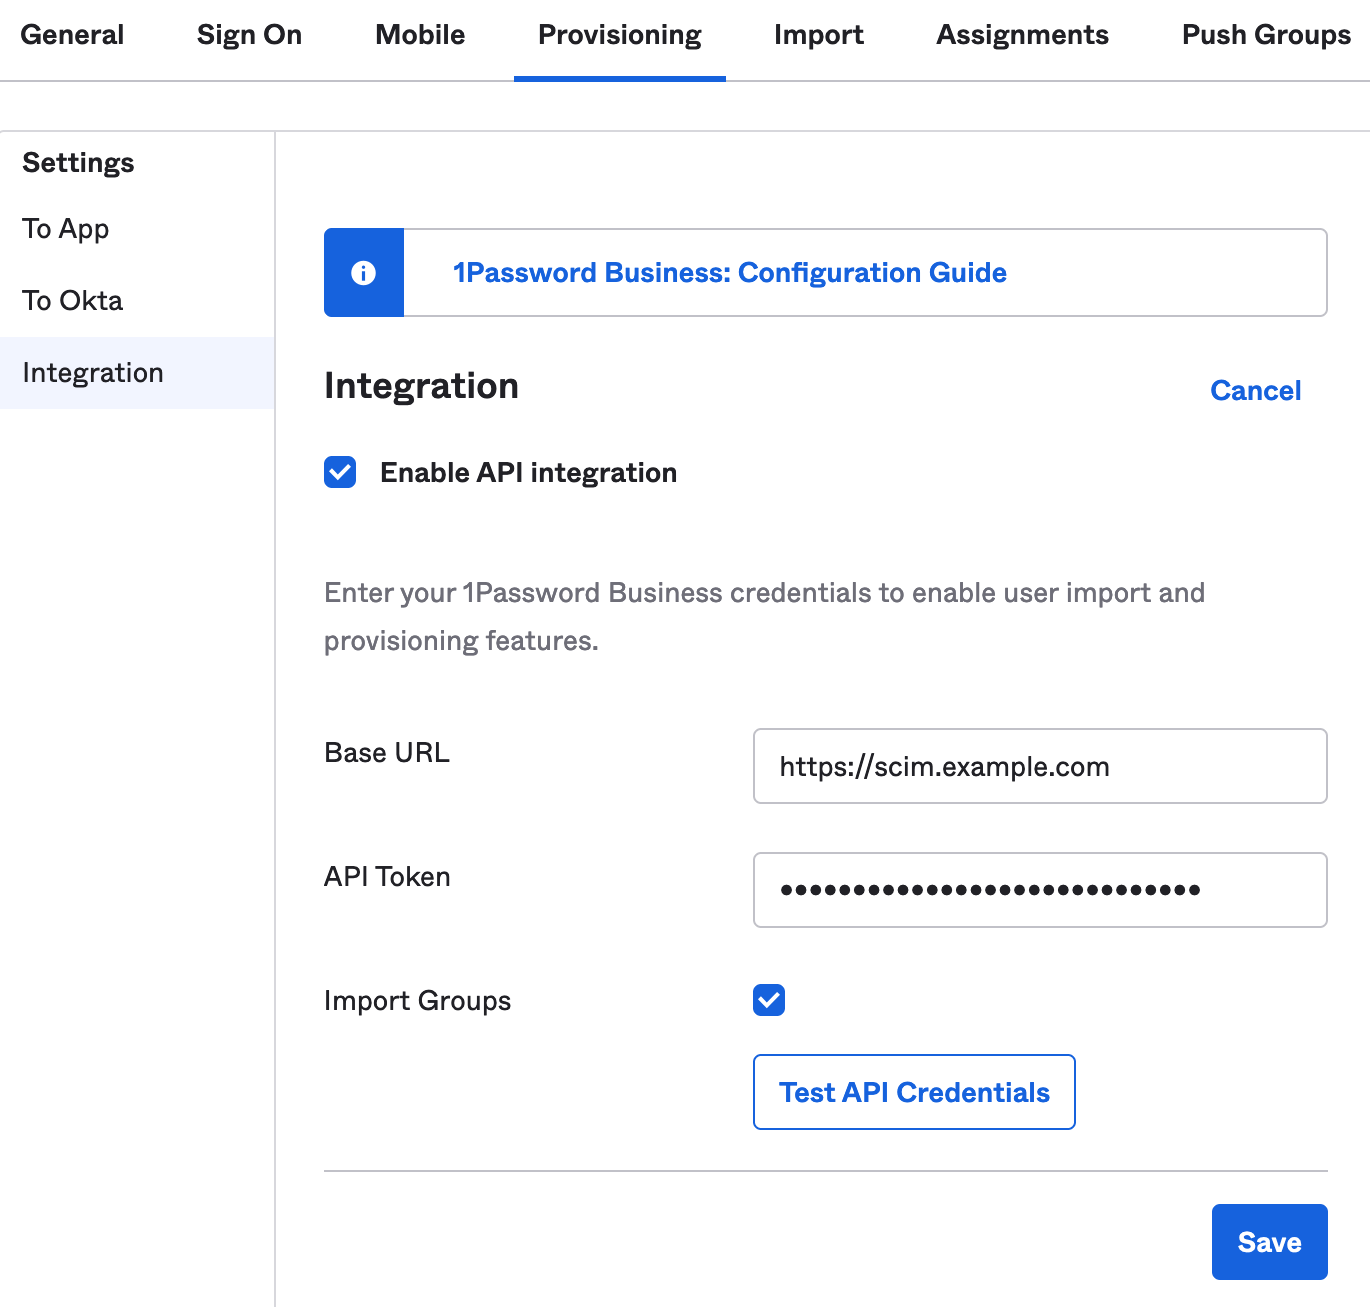
Select Configure API Integration, then turn on Enable API Integration.
Gib deine Base URL und dein API Token ein.
Base URL: the URL of your SCIM bridge (not your 1Password account sign-in address). Do not include a trailing slash. For example:
https://scim.example.comWenn du deine URL nicht kennst, stelle sicher, dass du die SCIM-Bridge eingerichtet und bereitgestellt hast.
API-Token: das Bearer-Token für deine SCIM-BridgeErfahre, was zu tun ist, wenn dir dein Bearer-Token nicht vorliegt.
Wähle Speichern aus.
Wenn du bei der Einrichtung der Integration die Meldung „Error authenticating“ (Fehler bei der Authentifizierung) siehst, öffne deine Integrationsseite auf 1Password.com und vergewissere dich, dass die Provisionierung aktiviert ist.
2.2: Test provisioning
Select Assignments and assign a test user or group you want to provision to 1Password. Then follow these steps:
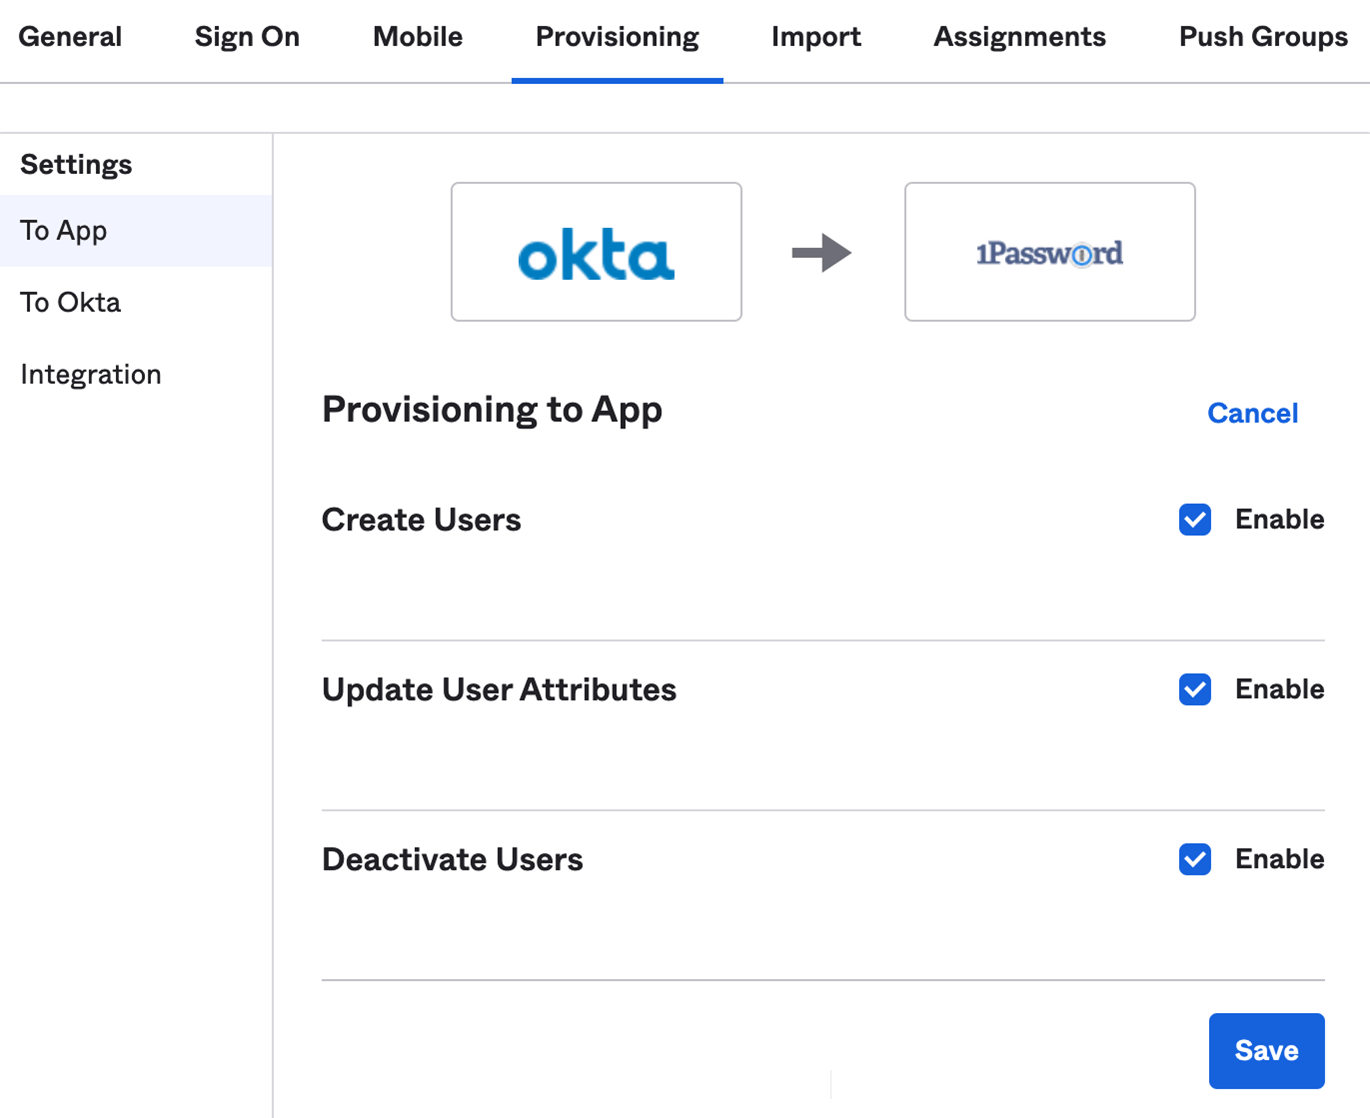
- Select Provisioning, then select To App in the sidebar.
- Select Edit and turn on these options:
- Benutzer erstellen
- Benutzerattribute aktualisieren
- Benutzer deaktivieren
- Wenn du die Attributzuordnungen anpassen möchtest, sieh dir die Standardzuordnungen unten an.
- Wähle Speichern aus.
Review the results of this test to make the selected users and groups were synced to 1Password, then continue to the next step.
If you see an error, make sure the user’s email address domain is in your 1Password account’s allowed domains list.
2.3: Assign users and turn on provisioning
When you’re ready to turn on provisioning, select Assignments and assign the users and groups you want to provision to 1Password.
Next steps
Wenn du die Bereitstellung aktivierst, werden bestehende 1Password-Nutzer mit Okta-Nutzern verknüpft, sofern ihre E-Mail-Adresse übereinstimmt. Wenn ihre E-Mail-Adresse abweicht, werden sie erneut zu 1Password eingeladen. Achte also darauf, dass alle betroffenen Teammitglieder vor dem Aktivieren der Bereitstellung ihre E-Mail-Adresse aktualisieren.
If a team member hasn’t accepted their invite after 2 days, they’ll receive a reminder email. Invites don’t expire.
Wenn du bestehende Gruppen in 1Password hast, die du mit Okta synchronisieren möchtest, füge sie den Gruppen hinzu, die durch Bereitstellung verwaltet werden:
- Melde dich an, bei deinem Konto auf 1Password.com.
- Wähle in der Seitenleiste Integrationen und wähle Automatisierte Benutzerbereitstellung aus.
- Wähle im Abschnitt „Verwaltete Gruppen“ die Option Verwalten und wähle dann die Gruppen aus, die synchronisiert werden sollen.
If you've previously used the SCIM bridge, make sure to select any groups that were already synced with Okta. This will prevent problems syncing with your identity provider, including duplicate groups.
Tipp
Learn about best practices for using automated provisioning.
Verwalte deine Einstellungen
To turn off synchronization, select Active > Deactivate.
To change the region to match your 1Password account, select General, then change Region Type.
Learn more in the Okta Help Center.
Unterstützung erhalten
Falls Benutzer und Gruppen nicht bereitgestellt werden, stelle sicher, dass die Bereitstellung in deinem 1Password-Konto aktiviert ist:
- Melde dich an, bei deinem Konto auf 1Password.com.
- Wähle in der Seitenleiste Einladungen aus.
- Wähle Automatisierte Benutzerbereitstellung.
- Stelle sicher, dass Bereitstellung von Benutzern und Gruppen aktiviert ist.
Anhang: Attributzuordnungen
The following are the default attribute mappings for the 1Password Enterprise Password Manager application in Okta:
| 1Password-Attribut | Okta-Attribut | Description |
|---|---|---|
| userName | Okta-Benutzername | Der Benutzername und die E-Mail-Adresse des Teammitglieds. |
| givenName | firstName | Dein Vorname. |
| Familienname | lastName | Ihr Nachname. |
Erfahre, wie du Okta-Attribute im Profil-Editor mit App-Attributen verknüpfen kannst.
War dieser Artikel hilfreich?
Freut mich, das zu hören! Wenn du etwas hinzufügen möchtest, zögere nicht, uns zu kontaktieren.
Tut mir leid, das zu hören. Bitte kontaktiere uns, wenn du uns mehr darüber erzählen möchtest.