With 1Password and Fastmail, you can create and manage Masked Emails for each of your online accounts. Each Masked Email is a unique, randomly generated email address you can use to sign up for a new account to keep your personal address private. You decide when you want to stop receiving email from it.
Set up Masked Emails
Before you can use Masked Emails, you’ll need to sign up for a Fastmail account and set up 1Password in your browser. Then follow these steps:
- Melde dich an, bei deinem Konto auf 1Password.com.
- From the sidebar, select Integrations > Fastmail.
- Folge den Anweisungen auf dem Bildschirm, um beide Konten zu verbinden.
Jetzt kannst du 1Password verwenden, um maskierte E-Mails in deinem Browser zu erstellen und zu verwalten.
Verwende maskierte E-Mails
To create and fill a Masked Email, visit a website where you want to create an account. On the sign-up page, select the email address field > Create Masked Email. Then select Fill Email.
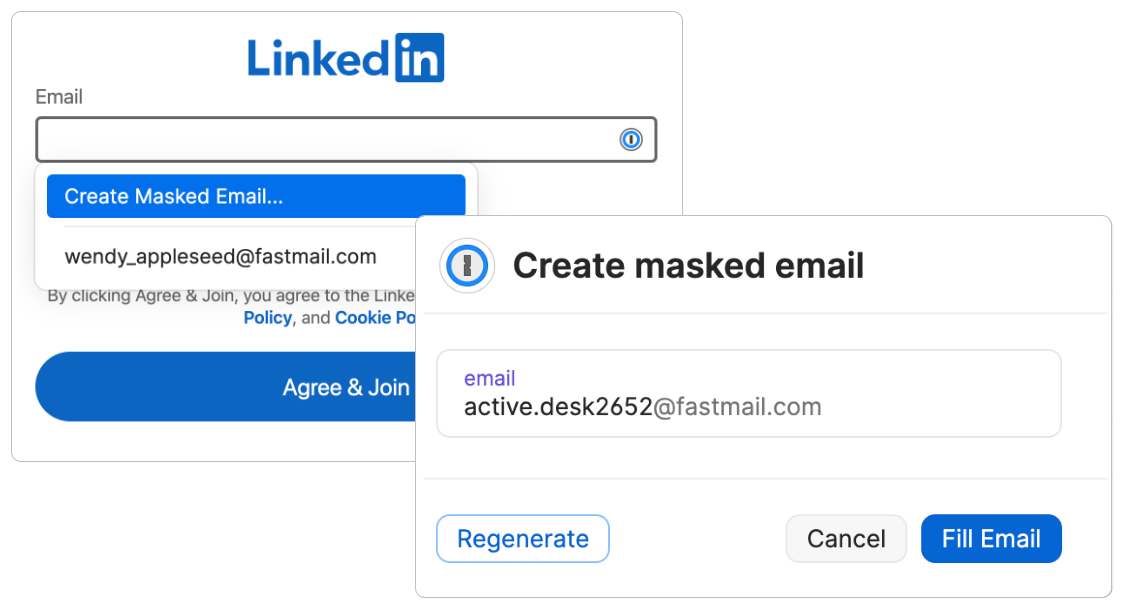
If you have multiple Fastmail accounts set up with 1Password, you can choose which account to use. To generate a different Masked Email, select Regenerate.
Von nun an wird Fastmail alle Nachrichten, die an die Maskierte E-Mail gesendet werden, in deinen Fastmail-Posteingang zustellen.
After you select Fill Email, enter the rest of the details the website requires. Use 1Password to create and save a strong password for the login.
Maskierte E-Mails verwalten
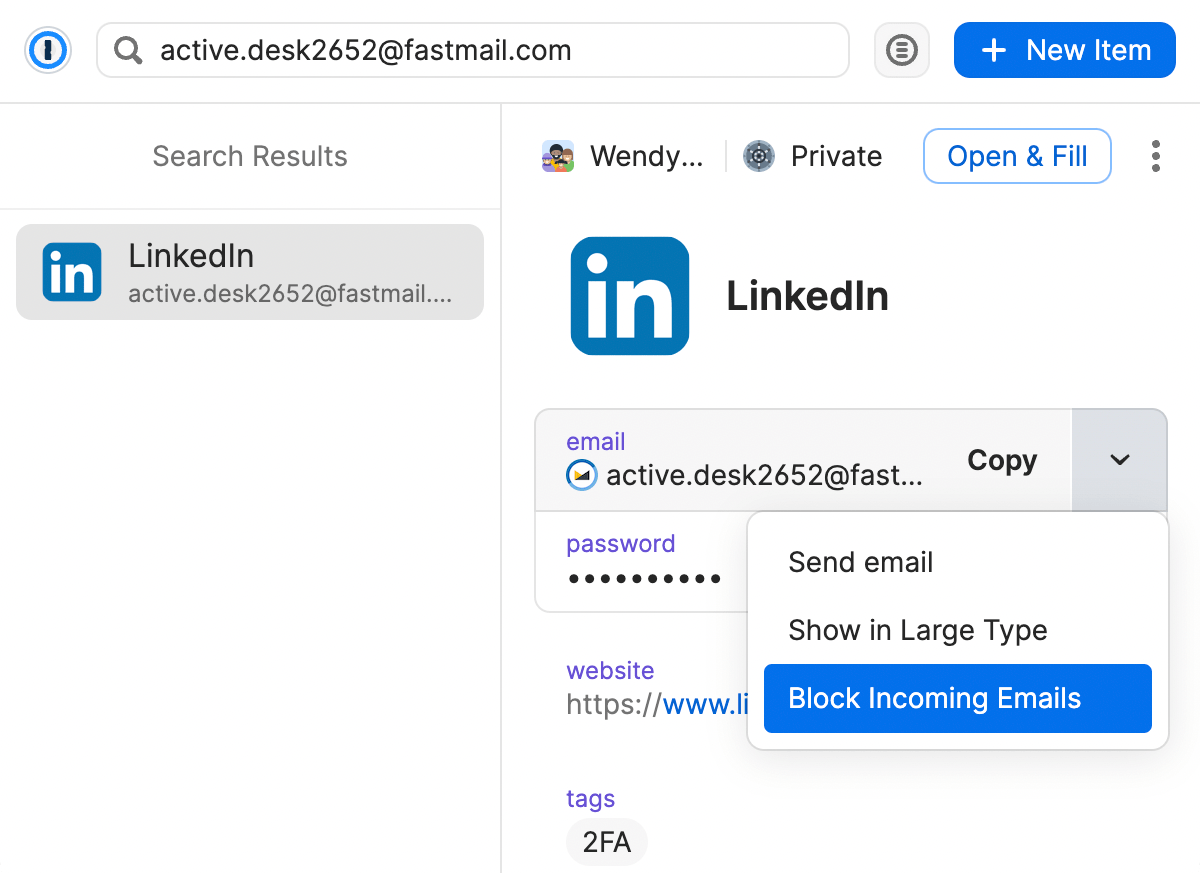
Wenn du unerwünschte Nachrichten an einer Maskierten E-Mail erhältst, kannst du entsprechende eingehende E-Mails blockieren.
- In your browser, select
 and enter the Masked Email you want to block in the search field. You’ll see the Login item details.
 - Select the down arrow next to the email address.
- Passe deine Weiterleitungseinstellungen an:
- To turn off forwarding, select Block Incoming Emails.
- To resume forwarding, select Unblock Incoming Emails.
To block incoming email to the alias from Fastmail, select Settings > Masked Email.
Unterstützung erhalten
Zum Erstellen und Verwalten maskierter E-Mails ist 1Password in deinem Browser erforderlich.
To delete a Masked Email, sign in to your Fastmail account and select Settings > Masked Email , then Delete.
So beendest du die Verwendung deines Fastmail-Kontos mit deinem 1Password-Konto:
- Melde dich an, bei deinem Konto auf 1Password.com.
- Wähle in der Seitenleiste Einladungen aus.
- Select Active and choose the Fastmail email you want to remove.
- On the settings page for the account, select Deactivate.
Mehr erfahren
War dieser Artikel hilfreich?
Freut mich, das zu hören! Wenn du etwas hinzufügen möchtest, zögere nicht, uns zu kontaktieren.
Tut mir leid, das zu hören. Bitte kontaktiere uns, wenn du uns mehr darüber erzählen möchtest.